# Interactsh : Self-hosting and logging
Let's configure a self-hosted interactsh server from scratch with Responder and logging !
I did not found some proper tutorial on the web for that, so let's fix this.
### Requirements
- A VPS server reachable from the Internet
- A registrar that allows you to configure your NS servers (ex: Cloudflare does it well and has a clear interface)
- [https://www.cloudflare.com/products/registrar/](https://www.cloudflare.com/products/registrar/)
- Golang installed on both the client and the server :
- [https://go.dev/doc/install](https://go.dev/doc/install)
- Optional : Docker installed on the server
- [https://www.digitalocean.com/community/tutorials/how-to-install-and-use-docker-on-ubuntu-22-04](https://www.digitalocean.com/community/tutorials/how-to-install-and-use-docker-on-ubuntu-22-04)
- Optional : Docker installed on the client
- [https://www.digitalocean.com/community/tutorials/how-to-install-and-use-docker-on-ubuntu-22-04](https://www.digitalocean.com/community/tutorials/how-to-install-and-use-docker-on-ubuntu-22-04)
### Packages to install
Install the interact-sh server on your VPS and the interact-sh client on your machine. Optionally, install the client on your VPS or on another VPS as well, that will be useful for later in this tutorial.
- https://github.com/projectdiscovery/interactsh
```
go install -v github.com/projectdiscovery/interactsh/cmd/interactsh-client@latest
go install -v github.com/projectdiscovery/interactsh/cmd/interactsh-server@latest
```
### Configure your DNS zone
Access your registrar's DNS management panel. In this example, we'll use Cloudflare.
- https://dash.cloudflare.com/\[your-hash\]/\[your-domain\]/dns/records
Setup the following records :
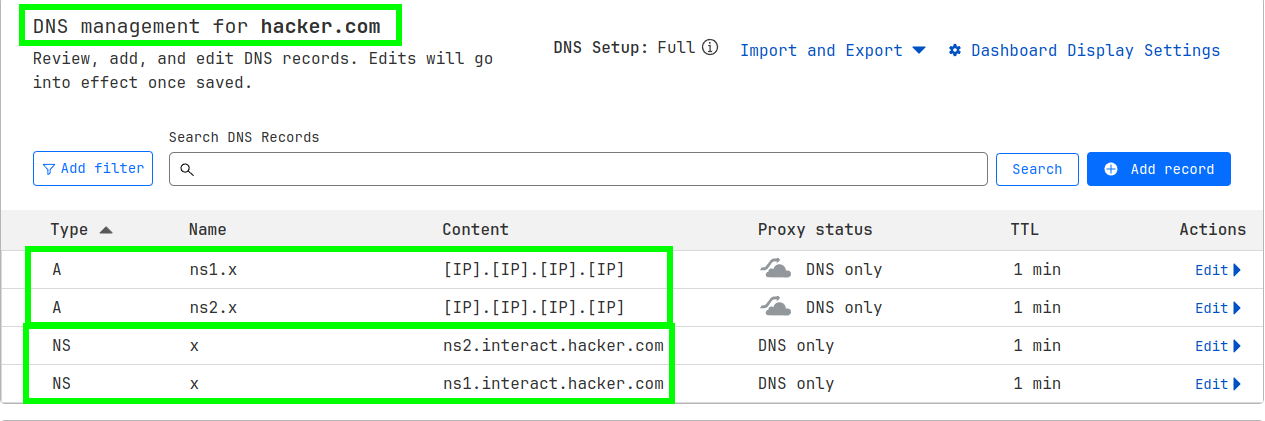
```
A NS1.INTERACT [IP].[IP].[IP].[IP]
A NS2.INTERACT [IP].[IP].[IP].[IP]
NS INTERACT ns1.interact.hacker.com
NS INTERACT ns2.interact.hacker.com
```
Wait a bit for the propagation. You can check if the records propagated correctly with the linux `dig` command. The below command should return the NS records pointing towards `ns1.interact.hacker.com` and `ns2.interact.hacker.com`
```
dig NS interact.hacker.com @1.1.1.1
```
### (Optional) Build the interact-sh docker container to use Responder
Follow this step if you wish to use Responder :
- [https://github.com/lgandx/Responder](https://github.com/lgandx/Responder)
On your VPS, build the interactsh docker container.
```
git clone https://github.com/projectdiscovery/interactsh.git
cd interactsh/cmd/interactsh-server
docker build . -t interactsh
```
### Run the interactsh server
On your VPS, execute the interact-sh server.
Here are a couple of tweaks that I used to ensure that everything is running smoothly
- Disable the systemd-resolved daemon to ensure that UDP 53 is available :
```
systemctl stop systemd-resolved
```
Here's the CLI that I use to launch the interactsh server :
```
interactsh-server -domain interact.hacker.com -dr -wc -ip [IP].[IP].[IP].[IP] -config ~/.config/interactsh-server/config.yaml -ftp -responder -acao-url http://localhost:9003 -debug -t [TOKEN] 2>> ~/logs.txt 1>> ~/stdout.txt
```
Explanation :
- `-domain` is required and must match your configured dns zone
- `-ip` is the public IP of your host. Ensures that the server listens on the right interface (especially if you have IPv6 / multiple interfaces)
- `-dr` allows dynamic response data. Can be useful depending on your usage
- `-wc` allows the wildcard interactions. Useful depending on you usage
- `-config` to specify the path of your config file, once again depending on your usage. For the sake of tranquility i set the following conf (though I'm not sure that it's useful) :
```
customrecords:
ns1.interact: [IP].[IP].[IP].[IP]
ns2.interact: [IP].[IP].[IP].[IP]
```
- `-ftp` to enable the ftp server
- `-responder` to use responder as we built the docker container earlier
- `-acao-url` if you wish to use the interactsh-web client that can be self-hosted as well (see below). Must match the URL to your docker service (sensitive to the port + 127.0.0.1 vs localhost)
- `2>> ~/logs.txt` as it writes its debug output to stderr. Useful for logging all interactions to a single file.
- `-debug` is required if you wish to have some easy to grep logs
- `-t` can be useful if you wish to automate things with a single secret. Avoids having the secret token to change each time you relaunch your interactsh server, for example, during development
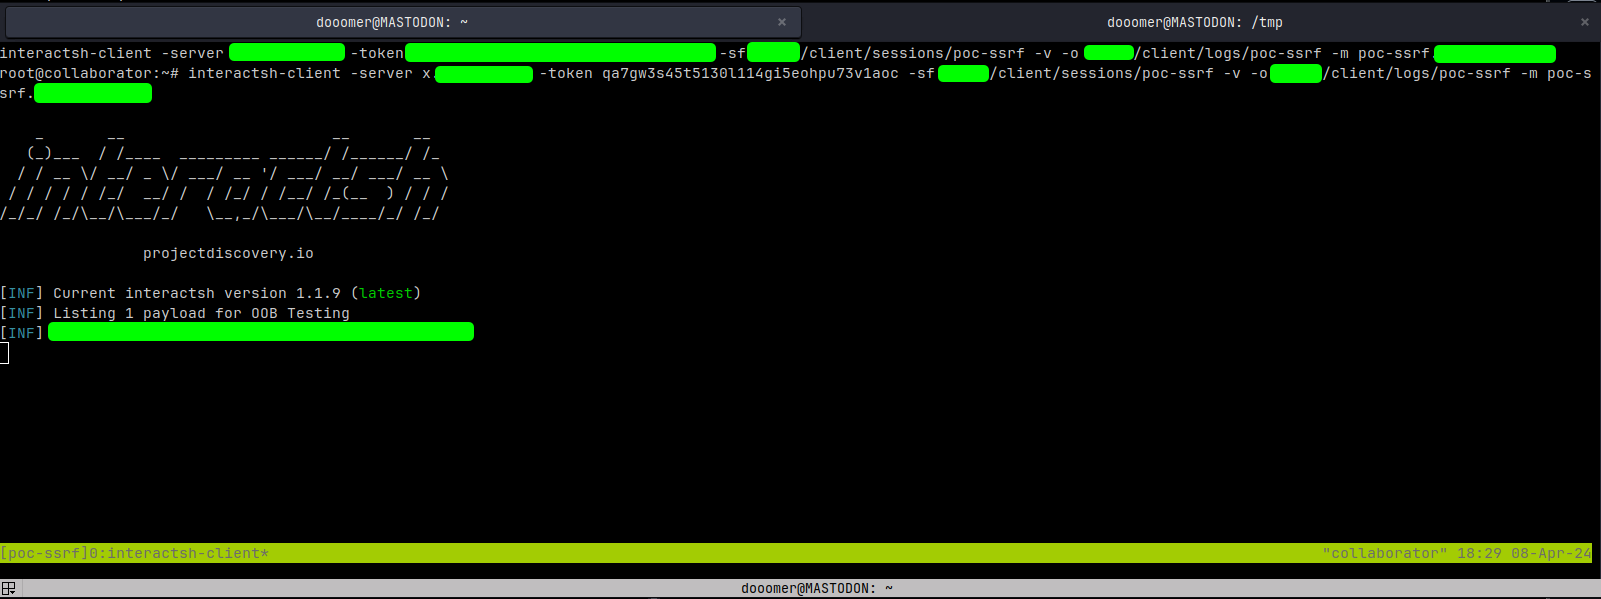
### Run an interactsh-client
Execute your client :
```
interactsh-client -server interact.hacker.com -token -sf /tmp/yoursessionfile -v -o /tmp/youroutputfile -m "pattern.interact.hacker.com"
```
Explanation :
- `-server` is required and must match the domain you've setup in your zone. It can be a second-level subdomain as well (ex: poc.interact.hacker.com) but the wildcard certificate for HTTPS connections will not be valid for those second level subdomains
- `-token` if you set your secret as shown above
- `-sf` allows you to specify a session. Useful if your client crashes, you will restore your context
- `-v` enables verbose logging. This allows you to view full HTTP requests/responses
- `-o` saves that output somewhere
- `-m` is optional but useful. Filters specific expressions to ensure that you only get the interactions that you want, for example, only "pattern.interact.hacker.com" will be retrieved and not all the scanners from the web generating interactions on your root domain
### Run the interactsh-web GUI
```
docker pull projectdiscovery/interactsh-web
docker run -it -p 3000:3000 projectdiscovery/interactsh-web
```
Don't forget to change the HOST and the token in the web interface. If that does not load, click `reset` ;)
### Monitor long running sessions
Let's say that you send a payload but it might only trigger in a couple of days. Well, if you close your client, you will not see it. Similarly, Burp Collabotor is dependent on your project and if you don't correctly save it, well...
Interact-sh logging is a bit complicated. To have long running sessions in the background, you either have to configure disk storage + encryption, or keep your client running.
This repo aims to provide a quick solution for logging / saving long runnning collaborators instances and ensure that no data is lost. It also helps if you need to (rip)grep a string in the logs later.
The idea is to move the load of the client on an always-running server (which can as well be the same as the interactsh-server). This way, sessions will persists even if you close all clients and lose your session files :) And of course, if we're storing the data on a remote VPS, let's provide some nice wrappers to quickly access the data, just as if you were running it locally !
So let's fix that with a couple of scripts and a bit of logic :
- [https://github.com/doomerhunter/interactsh-loggers](https://github.com/doomerhunter/interactsh-loggers)
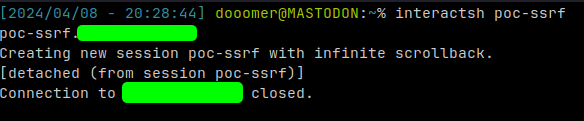
This `interactsh` script will :
- Connect to one of your VPS
- Create a new tmux session named after your collaborator payload (ex: clientname.yourdomain.org) if the session does not exist
- Launch the interactsh client to monitors interactions on that domain
- Automatically set and save your session
- Automatically set and save logs
- Output continously to the terminal with a tmux scrollback set to 99999
Don't forget to create / adapt the required repositories under `~/client/logs` and `~/client/sessions`
Set this script as an alias (for example store it under /opt/scripts, and set your alias to `alias interactsh='/opt/scripts/interactsh'`) to never lose a callback again ;).
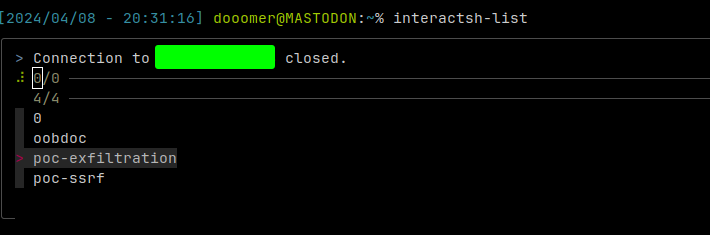
To easily access and view the logs, use the `interactsh-list` script that :
- List the remote tmux sessions and prompt you a nice UI (FZF) to choose your session and automatically attach to it
- FZF is required : [https://github.com/junegunn/fzf](https://github.com/junegunn/fzf)
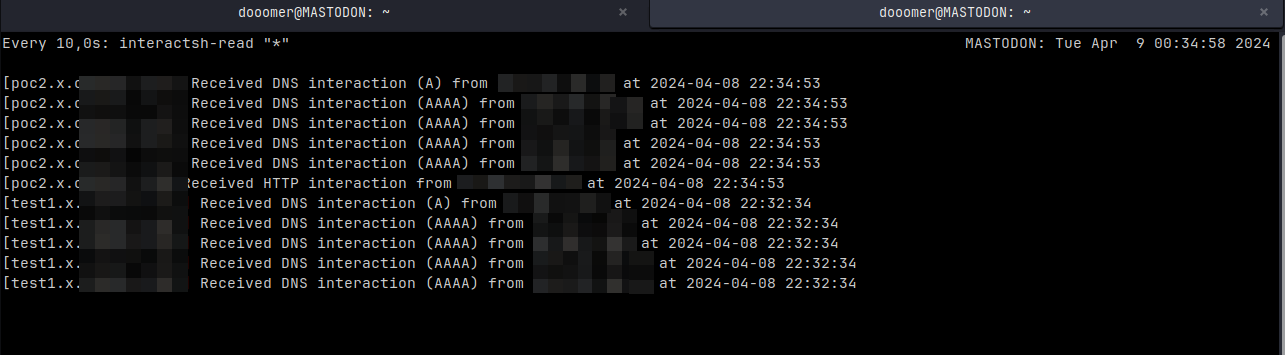
To quickly read the interactions metadata (like if you did not launch it with the `-v` flag), use the `interactsh-read `

Or you might prefer monitor one / all callbacks with a `watch` command :
```
watch -n 10 'interactsh-read "*"'
```
All clients tmux sessions are prefixed with "client-" to allow the `interactsh-kill` and `interactsh-killall` scripts to manage and kill the clients when they're not needed anymore.